No Moiré! - A Lightroom Workflow
**This post was first written in 2015. I keep it up as it has helped people in the past deal with moiré in their photos. The function is still there in Lightroom but it looks quite a bit different now. **
I knew when I purchased the Nikon D800E, the model with the anti-aliasing filter removed, that my chances of experiencing moiré in my photos would increase. The camera’s anti-aliasing filter covers your camera’s sensor and slightly degrades the sharpness so that moiré and other unwanted artifacts are removed. Remove the filter and sharpness increases. That’s good! The chance of getting moiré in my photos was a completely lower priority than getting the sharpest image possible. From what I had read, moiré was the most prevalent in man-made objects that have fine detail and where the pattern closely matches the pixel pattern on the camera’s sensor. Clothing and architecture were the two subject matters that moiré had a higher probability of appearing in. I didn’t think my landscape photography had a high likelihood of moiré, but the subjects (buildings) in my aerial photography projects might possibly produce a moiré pattern. But what exactly is moiré?
More and more camera manufacturers are removing the anti-aliasing filter from their high end digital cameras to increase sharpness with the understanding that moiré might be an issue under certain shooting conditions. When you are shooting a subject that has close parallel lines, like a building’s metal roof for example, and the pattern closely matches the pattern of your camera’s digital sensor, you have a higher likelihood of seeing moiré creep into your imagery. See the example below:
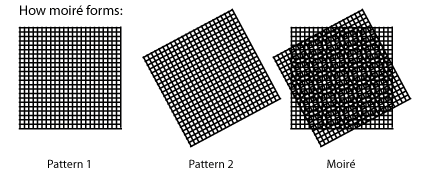
As you can see from the example from Nikon’s support page, you have Pattern 1 (our subject matter), Pattern 2 (our camera’s sensor design), and when the two overlap you get a third pattern which is moiré. Here is an example from a recent aerial photo for a client:
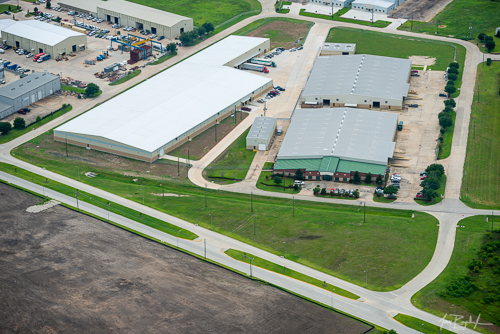
As you can see from this shot, nothing really pops out at you at this scale. Moiré can be easily missed if you don’t carefully look over your image for the pattern. Looking a bit closer at the green roof of the front building we can see the pattern easily.
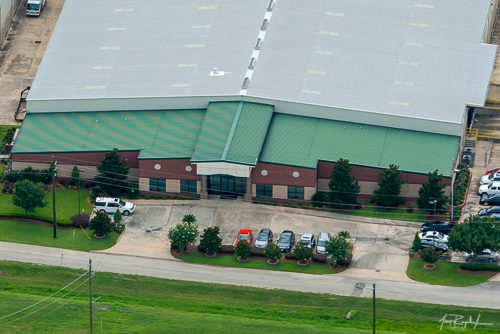
On the left side of the roof you’ll see what looks like a yellowish/orange banding appear diagonally across the lines of the metal roof panels. This is moiré. So now what? You’ve identified it, but how do you fix it? First of all, it’s best to take care of it at image capture. There are a few things that you can do at the time of capture to remove or reduce the effects of moiré:
1. Change your camera’s focus point.
2. Change your shooting angle.
3. Change your position.
4. Change your focal length.
That sounds easy, but if you’ve got a great composition and don’t want to change any of the above, your only option is to edit in post production.
Removing Moiré in Post
I have only had to deal with moiré once so far, knock on wood, so I’m far from an expert….and that’s a good thing for me! I’d say about 60% of the images from my most recent aerial photography project had moiré on the building’s green roof. We’ll use an image from this project to work through the steps to completely remove the moiré pattern from the image while maintaining acceptable sharpness.
Searching “removing moiré from photos” in Google pulls up over 400,000 hits with a dizzying amount of techniques using a wide variety of software packages with the most hits referring to Adobe’s Photoshop and Lightroom. I initially tried some recommended techniques (such as creating a layer of just the roof and using a Gaussian Blur on it) using Photoshop and didn’t have much luck. The Gaussian Blur did not retain acceptable sharpness of the roof and the workflow was a bit laborious. I needed to maintain the quality of the image while using a workflow that didn’t take a long time. Then I tried Lightroom 5.
The adjustment brush in Lightroom 5 is an amazing tool. I had used it previously to dodge and burn different areas of a photo but had never used it for anything else. The following tutorial assumes you understand the basics of using Lightroom 5, including how to import, edit in develop, and so on.
1. It is assumed that you have imported, backed up, and performed your normal workflow in LR5.
2. Select the image you want to edit go to the Develop Module.
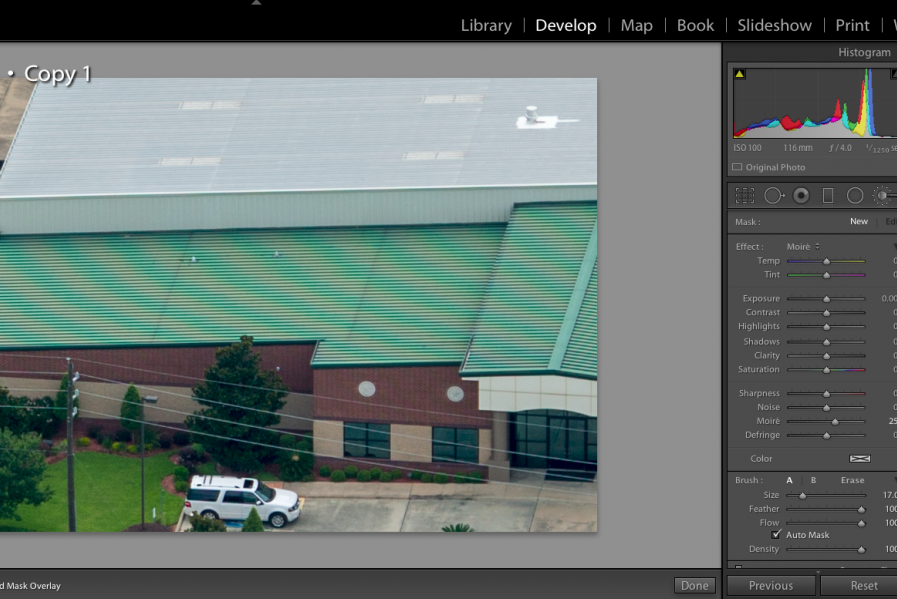
I’m working with a highly cropped portion of the original image. While editing the image make sure you zoom close enough to see the moiré.
3. Select the Adjustment Brush.
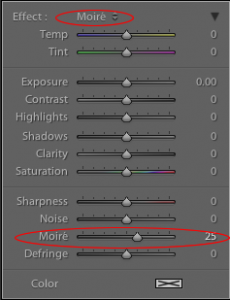
4. Next to “Effect”, select the “Moiré” setting. This should zero out all other adjustments and set the “Moiré” amount to 25, a good starting point.
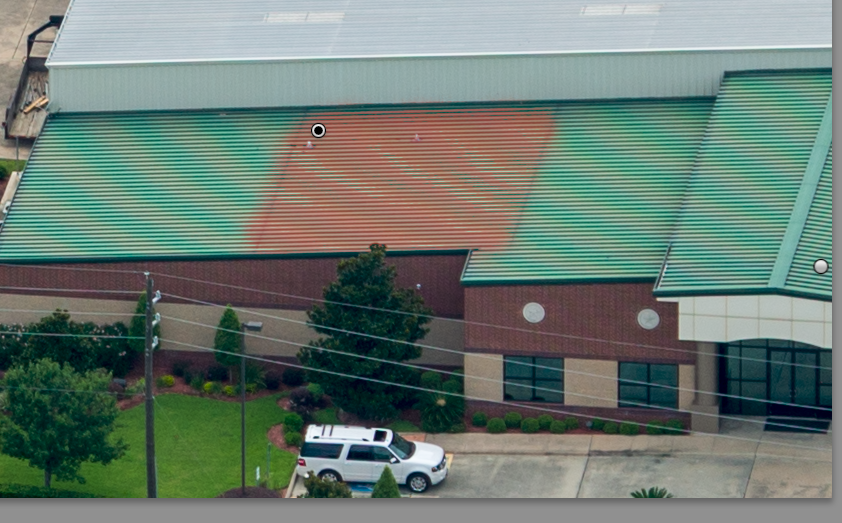
5. Select a brush size as appropriate and paint over the areas where moiré exists. To help visualize the areas covered by the brush you can go to: Tools > Adjustment Brush Overlay and then select a color. I chose red for my example.
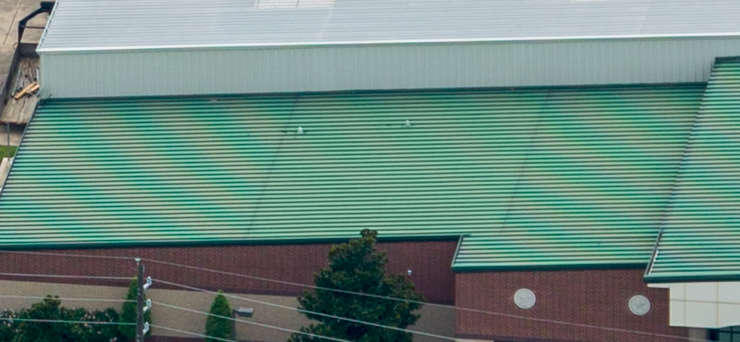
When finished click “Done” and you should see the results of your moiré adjustment. In the photo below, you can see that the setting of 25 did not remove enough of the moiré pattern from the image.
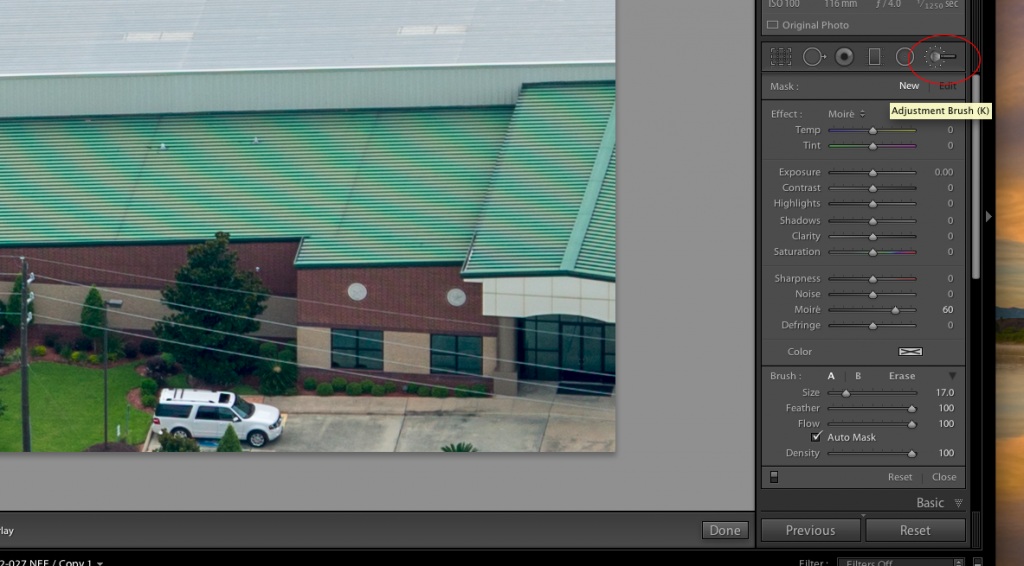
What’s nice about the adjustment brush is that you can select it again, and then select the “adjustment node” (for lack of a better word) and then change the intensity of the brush and click done. In this next example I have changed the intensity from 25 to 60 and the steps are shown on the image.
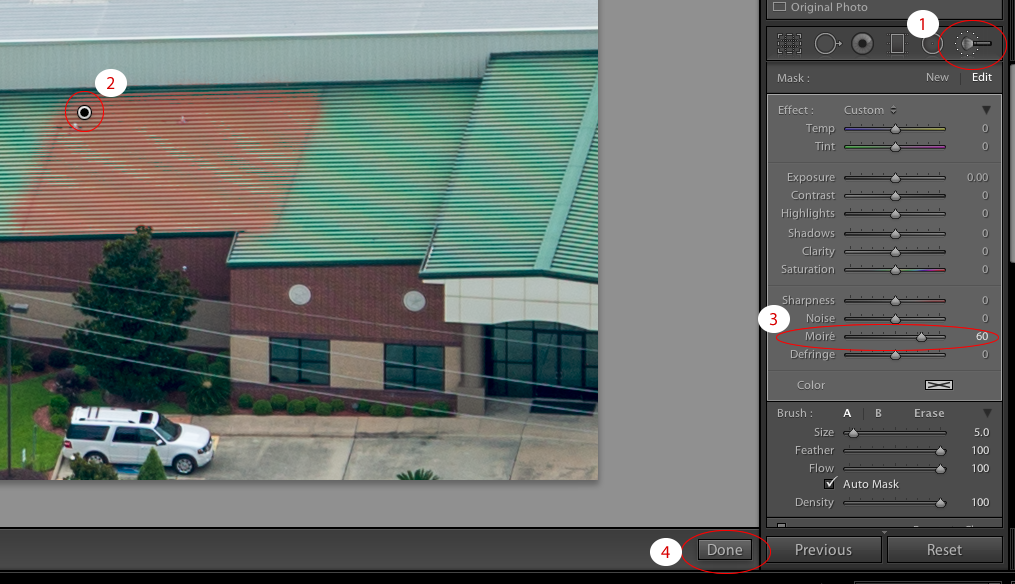
Step 1: Select the adjustment brush. Step 2: Select the adjustment node. Step 3: Increase the moiré amount to desired setting. Step 4: Select “Done”.
Always use the lowest intensity of the moiré adjustment brush that you can for removal. Some moiré will not be able to be removed completely. At the moiré setting of 60, I still had traces of moiré in the sampled area so I ultimately had to move it to 100 before the pattern was removed to an acceptable level.
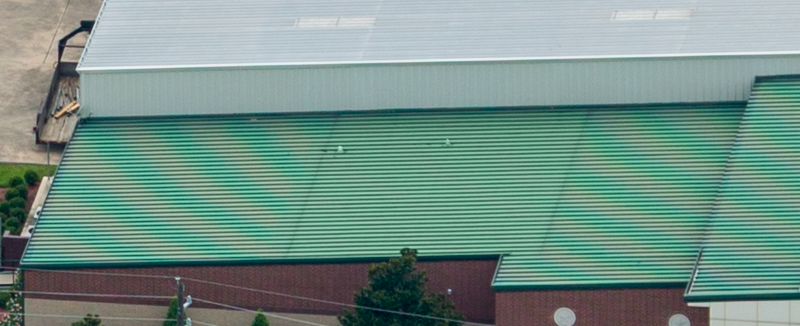
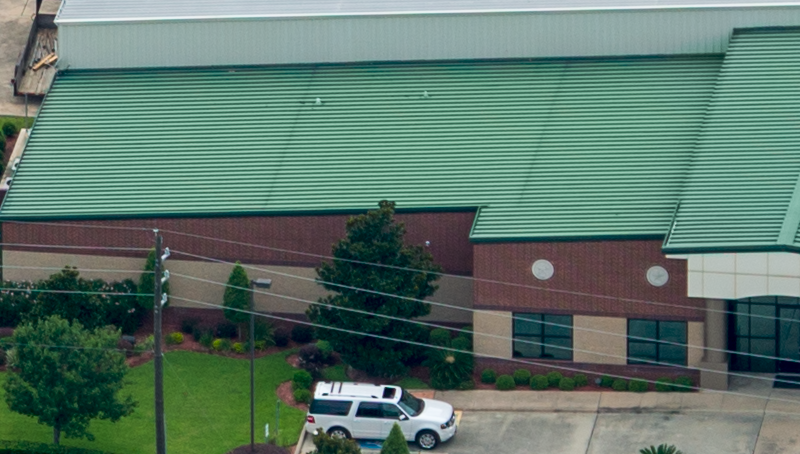
6. Once you’re happy with the results, finish painting out the area like we did in previous steps and you’re done.
I hope that this blog tip helps you out. Feel free to post comments and other tips below.
Thanks for reading!
-Tom